Sharing my love of Stampin' Up products through workshops, classes and sales


Tel: 0781 4451627 Email: alliejolliffe@hotmail.com


Sunday 25 December 2011

Merry Christmas everyone!

I just wanted to wish a very Merry Christmas to everyone...and may God bless you all in the coming year.

I thought I'd show you some little last minute Christmas gift boxes we made at my last class..I've used them for little gifts for my daughter and best friend, and embellished them with a bit of punch art.  Hope you like them!


Monday 12 December 2011

Handbags and gladrags

I can't believe it's been so long since I blogged!  I've had a virus that just wouldn't go away, and I've been busy with various projects, so I'm sorry for the long absence.  I'll try to do better!

I'll begin with a project I did for my Church women's group Christmas party.  I wanted to make a little table favour for each of the women, and as it's a women's group, what better than handbags?  How about little handbags filled with hand made chocolate truffles!

I used the last of my stash of retired Jolly Holiday DSP (my favourite), and some of the new Holly Berry Bouquet speciality DSP (new favourite), along with Cherry Cobbler cardstock and silver brads.  I think they came out really cute.  I made 40 of these little beauties, each containing two truffles (one christmas pudding flavour and one coconut, hand made by me!)  I tucked one of my business cards in each little bag, just in case any of the ladies fancied hosting a Stampin' Up workshop!  I must say, the bags went down a storm...the ladies loved them, and I had loads of really kind compliments, and an enquiry about doing them for a wedding shower/batchelorette party.

Apologies in advance for the quality of the pics, I forgot to take them before I left, so I had to snap some last minute shots at the venue in candlelight!


Hope you like them!  I've got loads of new things I've been working on to show you, so I'll be back soon.

Until then....jolly stamping!

Allie xx

Saturday 22 October 2011

More Simply Soft

Still playing with the Simply Soft stamp set I won in the raffle at training.  I love the look it creates, and how easy it is to make amazing images!  Plus, because it's in the hostess only section of the catalogue, it's incredible value....why not book a workshop with me and get yours!

This is a simple card layout that I go back to again and again and which works particularly well with floral images.  I used rich razzleberry ink and cardstock, on a white base, with accents of black to make the colour pop, and tie in with the black outline ink.  The sentiment is from the Trendy Trees stamp set, punched with the word window punch, and layered onto the modern label punch.  The finishing touch is a couple of sparkly basic rhinestones.


And then I thought, I wonder what it would look like in blue, so I did one in Tempting Turquoise...


And Pumpkin Pie


And Old Olive...


And Melon Mambo...


And here's the gang all together....


Definitely a more modern take on Simply Soft, compared to the vintage feel of the previous design...I love how stamp sets can be so versatile and used to create so many looks.

Hope you like them...please do leave a comment, I love to read them...and until next time...jolly stamping!

Allie xx

Tuesday 18 October 2011

Simply soft....simply stunning!

I was at our Jems team quarterly training session at the weekend, and was lucky enough to win a prize in the raffle (Jules, our SU Mummy, always does the best raffle prizes).  I won one of the new hostess stamp sets, Simply Soft.  It's a two-step stamp set with three floral images, made up of a solid outline stamp and a filler stamp, and one is stamped on top of the other.  You can line them up perfectly with a Stamp-a-ma-Jig, or you can stamp them just off centre to create a lovely effect.

We also received a goody bag of products at training (Jules does the best goody bags too!) which included the new First Edition speciality DSP and the gorgeous new vintage brads...and if you think these products look good in the catalogue, wait 'til you see them in the flesh! Oh my!  I was so inspired, I came home and created this set of thank you cards.

I've used Very Vanilla cardstock for the bases of all three cards, and rather than cover the base entirely with DSP and then add a very vanilla top note as a mat, I've been frugal and used the waste from cutting a top note from the DSP to create a frame for the image.  Before I cut the top note on the Big Shot, I trimmed my paper to the right size for the card front, and made sure it was centred on the die before I cut it, so the waste would fit perfectly on the card.  I've saved the top note die cuts for another project!


I've used accents of Rose Red on this card, and some Wild Wasabi and a blender pen to colour the stems and leaves.  Check out the sentiment with my cute new punch...nah, not really...it's a trick with the decorative label punch (thanks again, Jules).

On this shot, you can see I've decorated the inside with a simple strip of matching DSP, and a little stamping....I've "stamped off" the images (stamped first onto scrap paper and then stamped again without re-inking) to create a softer version of the image on the inside.


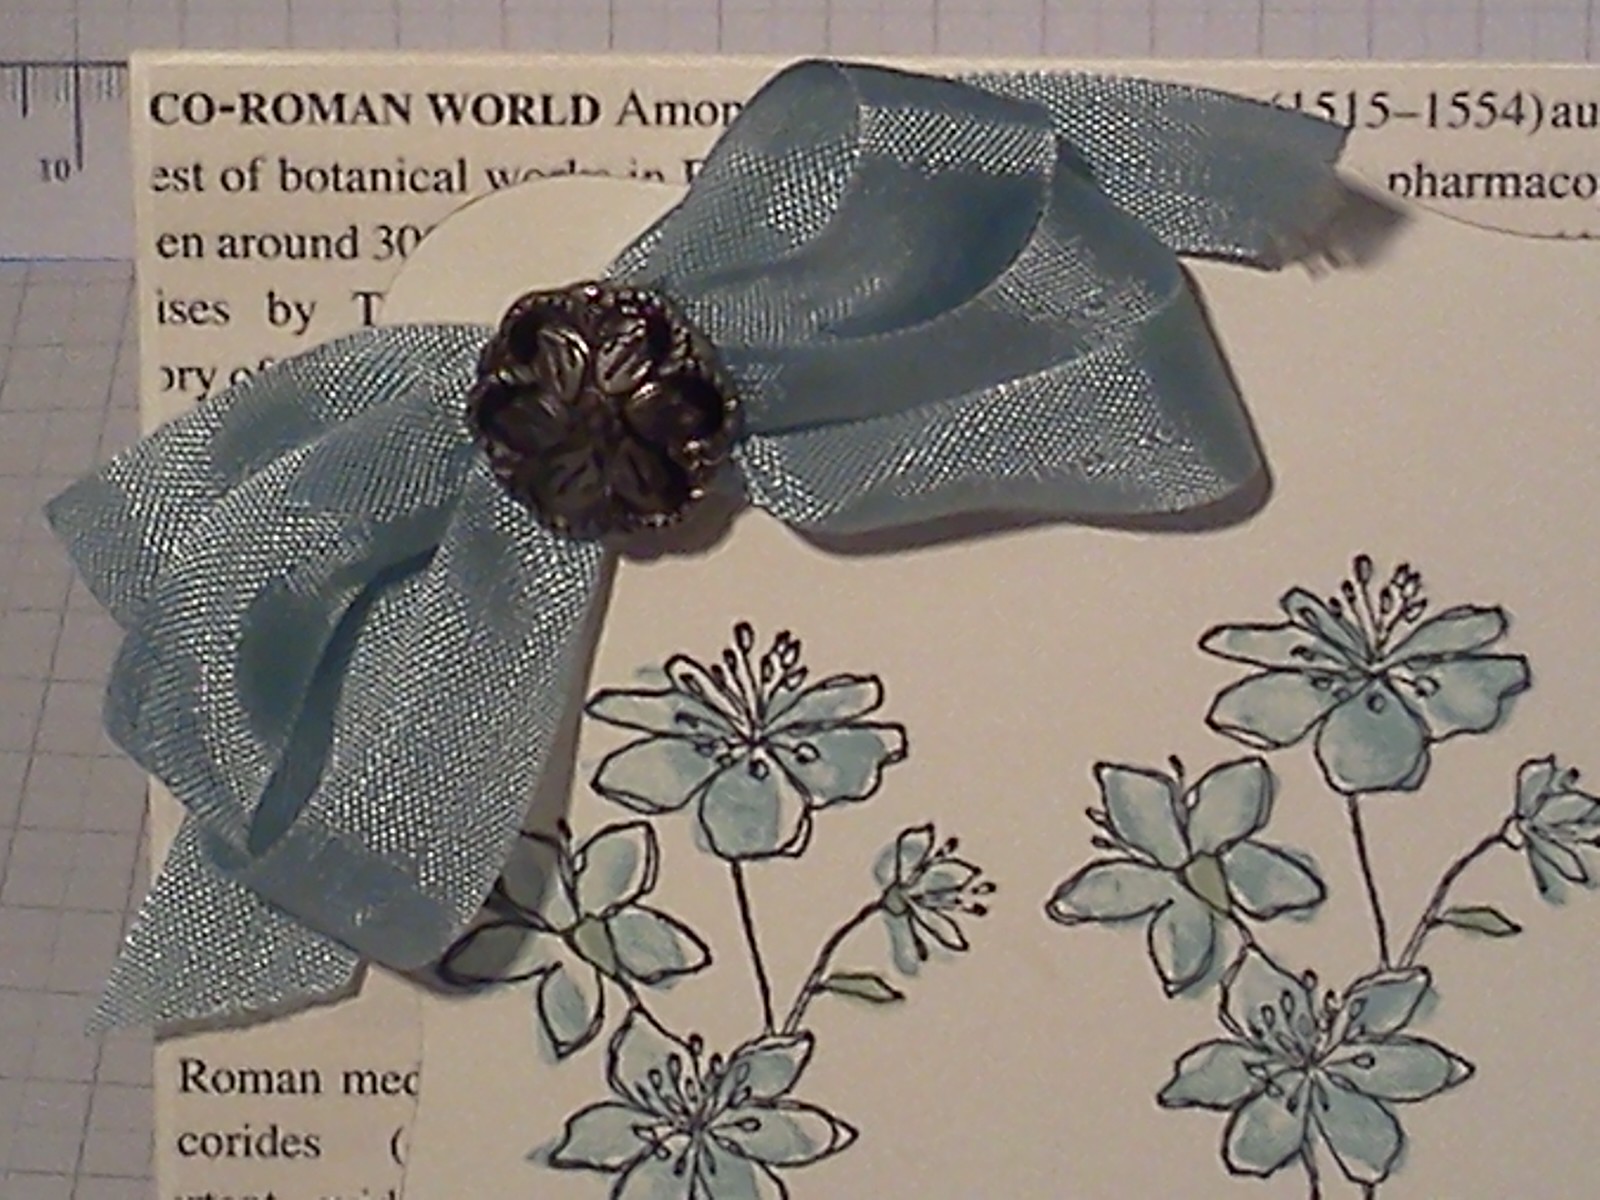
Here's the Baja Breeze version, this time on a landscape card.

Again, I've decorated the inside in the same way.


Check out my shabby chic bow, made from the gorgeous silky seam binding and beautiful new brads.  I'm hopeless at tying bows, but this is an easy way - Just loop the ribbon around your fingers as many times as you want, pinch it in the centre, and gather up and secure with a brad.  I'm not sure where I picked this tip up from, but I think it might be from my very talented fellow demonstrator Sarah-Jane here as I am always haunting her blog, and she does amazing things with ribbon :)


Here's the final version, with accents in Wild Wasabi.


And here's the set all together....I might make a little wallet for them, so that I can give them as a Christmas present :)  I've just thought, I might stamp a matching stationery set, with writing paper and envelopes too..I know just the person who'd love them!  I'm really pleased with how they came out, hope you like them.

The Simply Soft stamp set is only available to people who host a Stampin' Up workshop, and costs just £12 in clear mount, and £15 in wood mount.  What a bargain!  Hosting is easy...just invite some friends along to craft with you, and I'll bring everything you need to make a super free project.  If you and your friends spend over £150, you get £25 in hostess pounds to spend in the catalogue absolutely FREE!  The more sales you get, the more free stuff you get!  And if your sales reach £300, you get £50 to spend, plus one item from the catalogue at HALF PRICE!  That means you could get a Big Shot for just £43.95!

If you live too far away from me, you could hold a parcel party....I'll send you some goodies to play with, and a copy of the catalogue, and you can collect orders from your friends, and still get hostess rewards!  And if you aren't able to host a party in your own home, you could come to mine!

If you'd like to get some beautiful free stuff, drop me an email at alliejolliffe@hotmail.com.

Until next time...Jolly Stamping!

Allie xx

Wednesday 12 October 2011

Boo! Did I scare ya?

I held my first craft class this evening, and the ladies and I had such a lot of fun, creating fab projects using gorgeous Stampin' Up supplies.  But, as is sometimes the case the first time you do something, I made a boo boo....I forgot to take pictures of the girls' projects...doh!  They made some lovely Christmas themed mini milk carton favours, which they plan to fill with chocolate and hang on their Christmas trees, along with some punch art Santas and candy cane mice.  I'll try to get some pictures from them to post later.

In the meantime, here are the projects I made myself....I thought I'd do some Halloween treats, as I had a pack of the fantastic Frightful Sight papers.   I don't have any Halloween stamps, so I had to improvise for embellishments.


This little mummy treat box was made with the super cute pillow box die...I used torn strips of very vanilla cardstock, sponged with crumb cake ink, for his bandages, and punched his eyes with the Owl punch.


This mini milk carton is made from the Frightful Sight designer series paper pack and closed with a little clip from the mini clips selection.  I made a pumpkin embellishment using circle punches, sponged with ink, and added a face with punched cardstock.  Can you guess what's inside? lol


Judging by his face, I think this little ghost is afraid of spiders!  He's made from an upside down Owl punch body...I've stamped his little "boo" tag with the tiny tags stamp set and punched it out with the jewellery tag punch.

And here's all the gang together...with some of the treats I stashed inside....now I just hope some children visit on the night!


If you'd like to make cute projects like these, why not contact me to book a workshop, or come to one of my classes....I'd love to show you how.  Thanks for stopping by!

Friday 7 October 2011

All I want for Christmas is....Mice...eek!

My house has been overrun with mice!  But don't worry, no need to call pest control, it's just my swaps for next week's Julie's Jems all day training.  I've made 24 of these cute little critters to share with my fellow team members. I thought it would  be nice to do something completely different to the usual card.

They were made using mini candy canes (22 in a pack for £2 from Sainsburys, including the little bits of silver cord).  I've punched the bodies from whisper white cardstock using the large oval punch and stuck one on each side of the candy cane with mini glue dots.  I sponged around each body with basic grey ink, and added a little mouse face with the basic grey marker.   Then I punched two circles using the large eye part of the owl punch, added a bit of pretty in pink marker, pinched them between my fingers at the bottom, and glued them on with Tombow, and voila...ears!


And a close up.....


This is just one of many projects planned for my series of "Allie's Home Made Christmas" classes, starting next Wednesday.  For the next few weeks we will be meeting weekly and making all kinds of hand-made Christmas gifts, cards, wrappings and decor items.  Other projects include stamped candles, stationery sets, table favours, decorated photo frames and gift boxes.

The classes will cost £10 each and will include all supplies, use of my tools, and refreshments (you can expect mince pies, mulled wine and Christmas carols to get you in the festive mood!)  We start on Wednesday 12 October at 7pm.  If you're interested, please email me at alliejolliffe@hotmail.com, or call on 0781 4451627 to reserve a place and make sure I have your goody bag ready for you.  Spaces are limited, so please book early!

Monday 19 September 2011

Clever class and a birthday

I held a class on Friday and these are the things that my friend Lee made.  I'm so proud!  I love the dimension in her flower, and how the butterflies get smaller as they fly off the page :)


Supplies used (all Stampin' Up unless otherwise stated)
Cardstock: Very vanilla, cardstock vellum
Papers: pretty in pink DSP (subtles pattern stack)
Embellishments: pretty in pink grosgrain ribbon, mini clip, basic pearls
Tools:  Big shot, fun flowers die, milk carton die, top note die, beautiful wings embosslit, vintage wallpaper embossing folder, perfect polka dots embossing folder, eyelet lace border punch.

My second project is one of my own.  It was my dear friend from church, Alice's 50th birthday, so I made this card.  I saw the fold design on Dawn Griffiths' blog here and worked out the measurements for UK A4 sized card, rather than US letter.  The colour combo is baja breeze and so saffron..lovely and fresh!


Stamps: Special blessings (retiring), Just Believe
Cardstock:  Whisper white, so saffron
Papers: Subtles DSP patterns stack
Ink: baja breeze classic ink pad, baja breeze and so saffron Stampin Write markers.
Tools: word window punch, modern label punch, Big Shot, timeless type alphabet dies.
Embellishments: basic rhinestones, baja breeze seam binding

The sentiment reads May God Bless You.....on your special day, and comes from the retiring set, Special Blessings.  It might be retiring, but I'm not letting it go, I use it so much.  There's still time to order from the current catalogue, which finishes at the end of the month.  The new catalogue goes live for orders on October 1.  If you'd like a copy of the new idea book and catalogue, I now have my stock, so get in touch!  It's full of gorgeous stuff, and it's just lovely to browse...my copy is already dog-eared!

Hope you like my projects for today.  Will be back with more retiring products, and maybe a sneak peek of something new ;)


Sunday 11 September 2011

Wedding favours

Today I'm sharing some little wedding favours.  There's a mini milk carton, a little pillow box and a small triangle box.  I've used the Designer Series Paper stack in Blushing Bride (I thought that was appropriate!)  I used some acetate (Stampin' Up calls it window sheet) for the pillow box.

I've embellished the projects with butterflies and flowers made from cardstock vellum, accented with basic pearls.  The butterflies are cut with the Beautiful Wings embosslit.  For the flowers I've used the five petal flower punch and the fancy flower punch on vellum, which I've then run through the Big Shot with the perfect polka dots and vintage wallpaper embossing folders.  I finished off with ribbon and a punched border.

I hope you like them!

Don't forget my Retirement Party open house, today (Sunday) from 2pm to 8pm.  Drop by and have a go at making a card, and have a look at the catalogue.


 See you next time with some projects using retiring products!

Allie

Thursday 8 September 2011

Welcome banner...and some sell out news.

First, we have some more last chance list sell out news.

The following products are gone forever!

Choo choo
Sense of Time
Tart and Tangy
In colour ink refills
Wild wasabi 12 x 12 cardstock
Riding hood red 12 x 12 cardstock
Jolly holiday DSP
Silver elastic cord
Jumbo eyelets, antique brass and pewter
Star punch
Afterthoughts
Cute by the inch

There are still lots of items available, so please contact me about my retirement party on Sunday if you'd like to check out the catalogue or place an order.

So, on to today's project.   I volunteer at an occupational therapy unit, and we needed a welcome banner for our opening event, so this is what I came up with.  The idea came from the marvellous Jennifer McGuire here.  There's a fantastic video tutorial on her blog.

The banner was very quick and easy to do.  I used 12" x 1" and 10" x 1" strips of designer series paper, from the brights stack.  I joined them with staples and embellished with striped grosgrain ribbon and basic rhinestones.  I cut the lettering on my Slice, using whisper white cardstock, edged with my black StampinUup marker.  The span of the garland is about 4 feet.  I think it looks really effective!


Back tomorrow with some wedding favours!

Allie

Tuesday 6 September 2011

Retirement Party!

Retirement Party - Sunday 11 September, 2pm to 8pm at my house

If you'd like to drop by, make a project to take home, browse the catalogue and retirement list and maybe order some fabulous products before they disappear forever, please contact me.  Come along and have a play with some gorgeous Stampin' Up goodies, have a chat and some tea and cake!  This is a free event, but places must be booked in advance.

Hope to see you on Sunday!

Allie

Thursday 1 September 2011

Bleary-eyed, but excited!

Well, I am very bleary-eyed this morning, because I was up until stupid o'clock, poring over the retired list and the demonstrator sneak peek at the NEW CATALOGUE!  Unfortunately, only demos can see it before October 1, but a relaxation of the rules means that I can show you some projects made with new goodies over the next few weeks, so stay tuned!  You're going to love the new catalogue - it's BEAUTIFUL!

I have a limited number of the retiring catalogue available, so if you'd like one, and a copy of the retirement list, contact me ASAP....you only have 4 weeks to order from it, and things sell out quickly, so it's first come, first served.   And as a special offer from me, orders over £50 get free postage, saving you £4.95!

Wednesday 31 August 2011

Last Chance List!

The last chance list is now available. Retiring products are available while stocks last, so contact me ASAP if there's something you can't live without!  Check the list out, here  


http://204.228.150.61/docs/lastchance/en-GB/Availability_en-GB.pdf

Thursday 25 August 2011

Back online, and a big thank you!

Just a quick note to say I bought my new laptop this evening, having been without a computer for a month (eek!)....I'm just sorting it out, loading on my software and sorting out all my settings, so I should be back to posting soon!

I'd like to say thanks to all my lovely Stampin' Up sisters, and my Stampin' Up Mum, Julie, who sent me birthday cards this week.  I've never had so many beautiful handmade cards, I felt quite spoilt!  Thanks so much Jems!  I'll get some pics posted ASAP.

Back soon with a new project!

Friday 29 July 2011

Sunny garden butterflies!

Here's a sneak peek at the projects for my first ever card class, next week.  The lovely card wallet is CASEd from a design by my wonderfully creative upline, Julie Kettlewell, and would make a great gift (Christmas is coming!).  Inside there are four cards and envelopes.

Again, I'll be using Sunny Garden DSP, the Butterfly Prints stamp set (the clear mount is AMAZING value at £12.95, I've used it over and over again, and there's a co-ordinating punch, so no fussy cutting) and the In Colours,  Peach Parfait, Poppy Parade and Pear Pizzazz.  The colours and designs are so Summery, they make me happy (even though we've had more rain than sun so far this holidays).


The class is on Friday evening, 5th August, and costs £10, which includes the supplies you need to make this project and a couple of other surprises, plus refreshments and cake.  Contact me on 0781 4451627 for further details.  I'd love to have you come along and share what I love!

Thanks for looking!

Allie x

Thursday 28 July 2011

A warm welcome

My new next-door neighbours moved in today and I wanted to give them a warm welcome, so I decided a card and flowers were in order.


I used the lovely In Colours, Peach Parfait, Pear Pizzazz and Poppy Parade, teamed with the Sunny Garden designer series paper, perfect for Summer.  I love how Stampin' Up makes it so easy to co-ordinate!

I don't have a new home sentiment, or stamp set, so I stamped the letters of "welcome" with the Schoolbook Serif alphabet stamp set, and punched them out with the small and large tag punches, layered together.  I topped each tag with a snippet of whisper white satin ribbon, and added butterflies stamped with the Butterfly Prints stamp set, blinged up with Basic Rhinestones.

This was a huge card (a whole A4 sheet folded in half lengthways, so I had to make a custom envelope.  Not a problem!  I used a 12 x 12 sheet from the In colour DSP patterns stack, which co-ordinated perfectly!

Back tomorrow with a sneak peek of my first card class project!

Friday 22 July 2011

Simply Stampin' Challenge

I've never entered a challenge before, so I thought I'd give it a go. I hope I'm not too late....if I am, never mind, there's always next week!  Not too hot on the technical aspect of blogs and links, but hopefully, it will work!  It's a sketch challenge this week, and here it is:


And here's my card:


I've used baja breeze and whisper white cardstock, and baja breeze spotted DSP.  I used the Flower and Vine wheel to stamp the border in baja breeze classic ink, and added a layer of DSP behind, which is punched with the scallop edge punch.  I've used basic rhinestones on the flower centres, and made rolled roses in whisper white (using the 1 3/4" circle punch) and punched leaves using the bird punch.

I've never used a sketch before, or tried a challenge, but I really enjoyed it.  If you want to join the Simply Stampin' Challenge, you can find it here.

Thanks for looking!

Allie x